
I have to admit. I'm a little sad this is my last "official" wedding recap post for you. I've slowly been reliving our wedding vicariously through these recaps and it's been wonderful. I loved everything about our wedding, and I was so happy to see that when it all got laid out it was exactly what I wanted. Better actually. I had a few moments when I was 3/4 of the way through a project and thought "oh god, what am I doing?! How does all of this tie together?! This is going to look like crap! I've gone too far though!!!". I think we all have those moments. But I stuck it through and I'm glad I did. So. Here you are. The little details that made our wedding about "us" and not just "a wedding". Please let me know if there's anything I missed or that you'd like to see a tutorial on, I love hearing your feedback! These are in absolutely no particular order (the majority of these photos are from Stillmotion, they're amazing!):
Food

I've already said how we basically booked our wedding around our photographer and caterer. When they were available = our wedding date. Dan and I each got a priority, mine was photography, his was food. I think the two worked well together no? So anywho, the incredibly talented Ezra Title worked in a lot of what we loved from previous meals with him and from our own favourites. For example, the prosciutto and melon above. When I lived in Italy I don't think there was a day that went by when I didn't eat this eat least once. Usually twice. Or more. Don't judge me. We also LOVE organic beef, so Ezra did us the organic flank steak for dinner. The salted caramel ice cream was a favourite from Dan's birthday dinner the year before that we both would like to eat by the gallon. And the cake. Well come on, it's pretty evident by now that that was all me!
I think our guests really appreciated that we shared our infamous "Ezra meal" with them and appreciated every mouthful. Since the wedding we've gotten a number of comments about it being the best meal of their life, so mission accomplished I think!!
Teapots & Creamer/Sugar Pots


Once I found my inspiration with the teapots I went whole hog on them. I scoured thrift shops, Craigslist, and friend's parent's silver cabinets for old unused clunky teapots that no one loved any more. I would not spend more than $10 on a teapot (I had one exception but it was worth it and balanced out with some other bargains I got). In the end, I amassed something like 30+ teapots and 50+ creamers. I spent hours with bridesmaids, parents, and my parent's neighbours polishing those puppies up and making them gorgeous again. They were so pretty and added such a unique touch to the tables, they were totally worth the effort. Plus I think the fact that half our guests had had their hands on them at some point made it all the more special ;) I still have them all in the basement, somewhat unsure of what to do with them. Maybe a rental company is in sight?! LOL!
A quick note about the flowers, the white roses were for my Omi (grandmother) who had passed away the summer before the wedding. She had the most gorgeous rose garden you've ever seen. I DIY'ed the baby's breath cream/sugar pots to save a good few hundred dollars off the floral budget. Totally worth it. Our florist, Pink Twig, was incredible to work with and I think they enjoyed the "outside of the box" edge the teapots brought to the arrangements.
Papergoods
I designed, cut, and assembled all of my papergoods myself. What a task that was! But it was full of love! My handy dandy Cricut worked late every night cutting my menu backers, place cards, and little placecard birds. I used Sure Cuts A Lot in conjunction with Illustrator to break out of the Cricut cartridge box. I love that program and the world it opens up for you! For the corners of my menu and placecards, I used a corner punch and emboss from Fiskars that added a bit of a vintage flair.


Table numbers were the bane of my existence for about a week. I would sit and think and google search for ideas. Nothing seemed just right. I eventually gave up and ended up slapping these together at the last minute with a lace border and the same font we used on our invites and programs. They were simple and functional, and looked cute with our vintage flair.

Our programs I designed, printed, assembled and sewed, to coordinate with our elevator invites. Whew. Those were a lot of work! More than our invites!!!


Can I just say how much I loved our escort cards? I realize they got tossed out, but I freaking loved them. We sat them in flats of wheat grass spread out on a barnboard table Dan made for me. Each table got their own pattern of fabric covered button which coordinated with the fabric on their caramel favour. Yes. I am that anal retentive and I think it was worth it :)

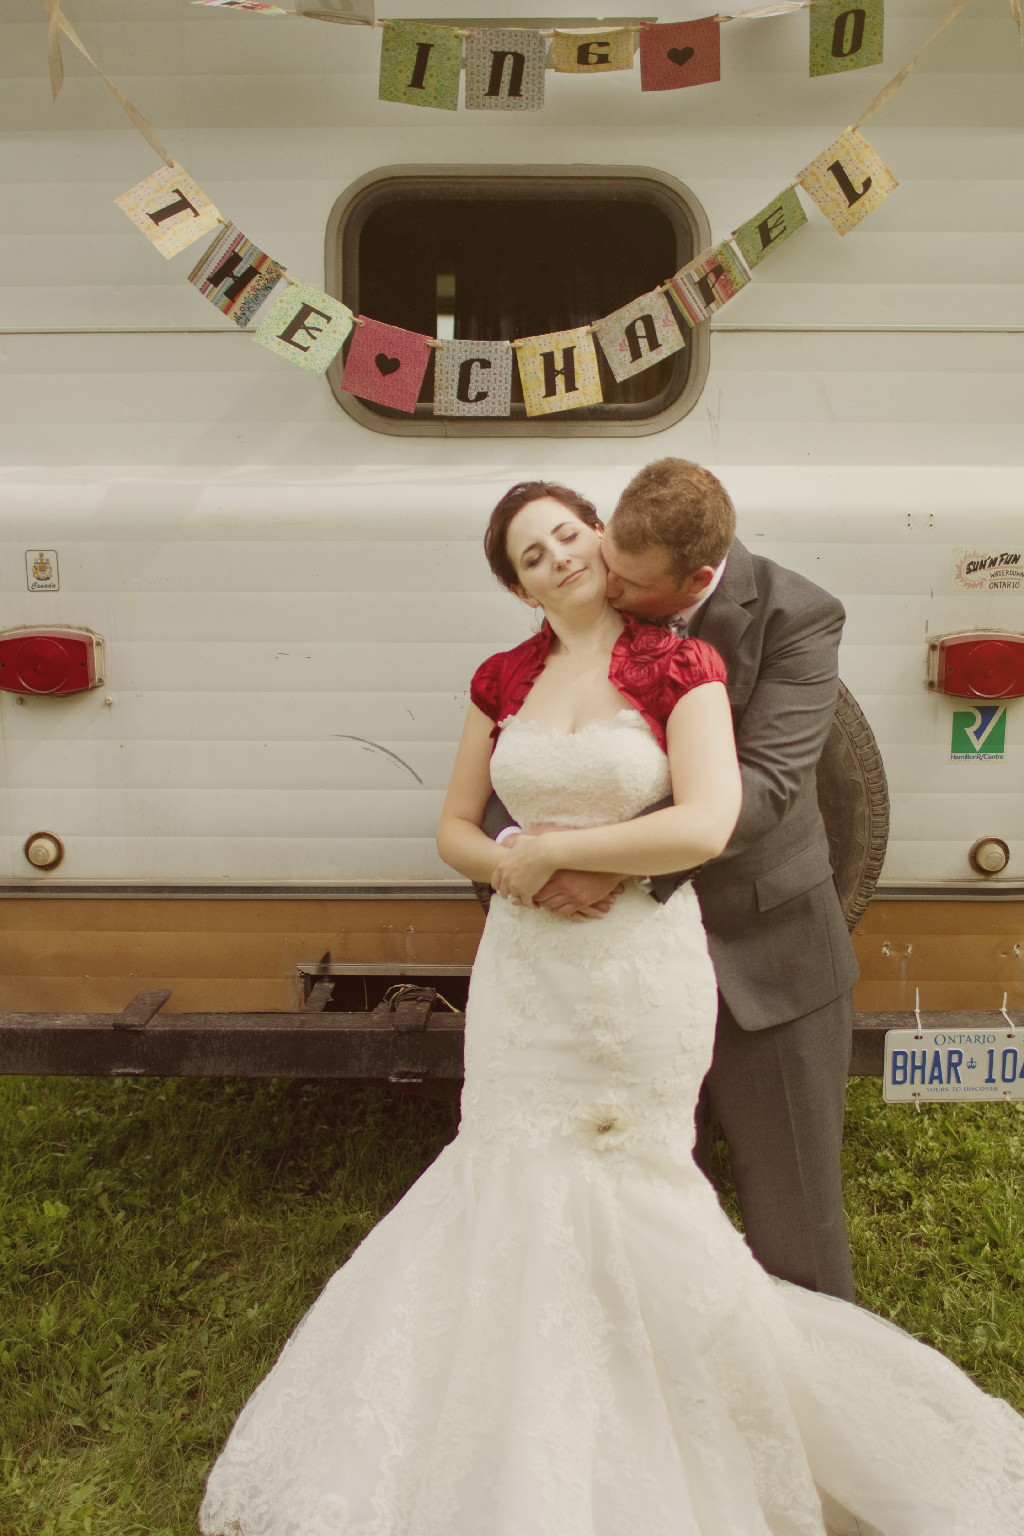


I'm not going to lie and I'm going to totally toot my own horn, my banners were amazing. LOL! They made for my favourite shots of the day. They were actually on my DIY projects to-do list and I had scrapped them because I thought I didn't have enough time. One night we were sitting around and I thought "Oh screw it, I'm going to give it a go" and put together the banners while we watched a movie with a friend. The Just Married banner came out so well I thought I'd try the Going to the Chapel as well! I am SO SO SO happy I made that push and got them done, I think it just completed the Winnebago and put that polished touch on our photos.
Flip flops & Pashminas


Love your guests. Treat them like royalty. They've come a long way, gotten all dressed up for you, sat through the speeches, given you a gift, throw them a good party and make sure they're comfortable in return! I smashed the Old Navy $1 flip flop sale and bought as many sizes as I could get my hands on. I think I ended up with about 50 pairs (both mens and womens), and honestly, I likely only needed about 25. I found another bride who bought my leftovers off me though, so that was great news for me!
The pashminas I bought at a little cash and carry shop for $5 a piece. I bought 30 of them and I should have bought 50! They went like hot cakes! It started pouring rain halfway through our dinner, so I think the ladies snapped them up to cut the chill. I still get compliments from our friends and family who say they're the nicest pashmina they have and still use it all the time!
I put little tags on both the pashmina's and flip flops just to personalize them rather than just shoving them all (artfully) in a box. The baskets I bought in Chinatown for about $15 and worked really well and looked very cute and rustic. The flip flop tags said "nice shoes" around the edges. That was the first thing Dan ever said to me, so it was a little inside joke to us.

Guest book

I made our guestbook using Photobook Canada and I loved it! The quality was fantastic and they had a special linen paper specific to guestbooks. I used our engagement photos and created a 12 x 12 book about 30 pages long. I loved reading through all the comments from our guests after the wedding. Every page had at least one note and some of our guests got creative with little bubbles over our heads, etc. It was fantastic and adorable!!!
Hangers


What bride doesn't want a Lila Frances hanger?! When I showed the hangers to Dan he was so excited about them he wanted one for himself AND all his guys. Our entire wedding party each got their own hanger, including the kids. Lila was great to work with and since we ordered early (and in bulk) she gave us a great deal!
Okay. I seriously have to take a break. I have so many more details to share with you, and I'm afraid of making this the post that breaks the site! I'll be back with details part two ASAP!


