Sunday, August 22, 2010

The girls hit the town!

This weekend was my bachelorette party. I made it pretty clear I wanted something low key. No inflatable penises, no getting guys to eat candy off my shirt for a dollar, not even drinking and barhopping. Not my style. That's right, I'm an old woman trapped in side of a 29 year old's body people! I'm totally happy with that by the way. 

We started off our day with mani/pedis at Elixir Organic Spa. Awesome! 


The ladies there were so sweet and let us have the run of the place for the afternoon. 

 (Really ready for my mani/pedi!)
 
Their products were so soft and silky and we were so relaxed by the end of it I really wondered if we would even make it through the rest of the day!

(Pouring some bubbly in my fancy pants bride glass)          

After we were thoroughly pampered, wined and cheesed, we piled into my sister's mom-mobile bachelorette-mobile. 


We had a bit of time to kill before dinner, so we stopped at Starbucks for a latte. Caffeine was a good idea after all the new age music and foot massages!!!


Oh by the way, all the girls are wearing "I <3 Veronica" tattoos. By product of putting them on your chest means everyone stares at your chest... Flattering and creepy, but you asked for it ;)

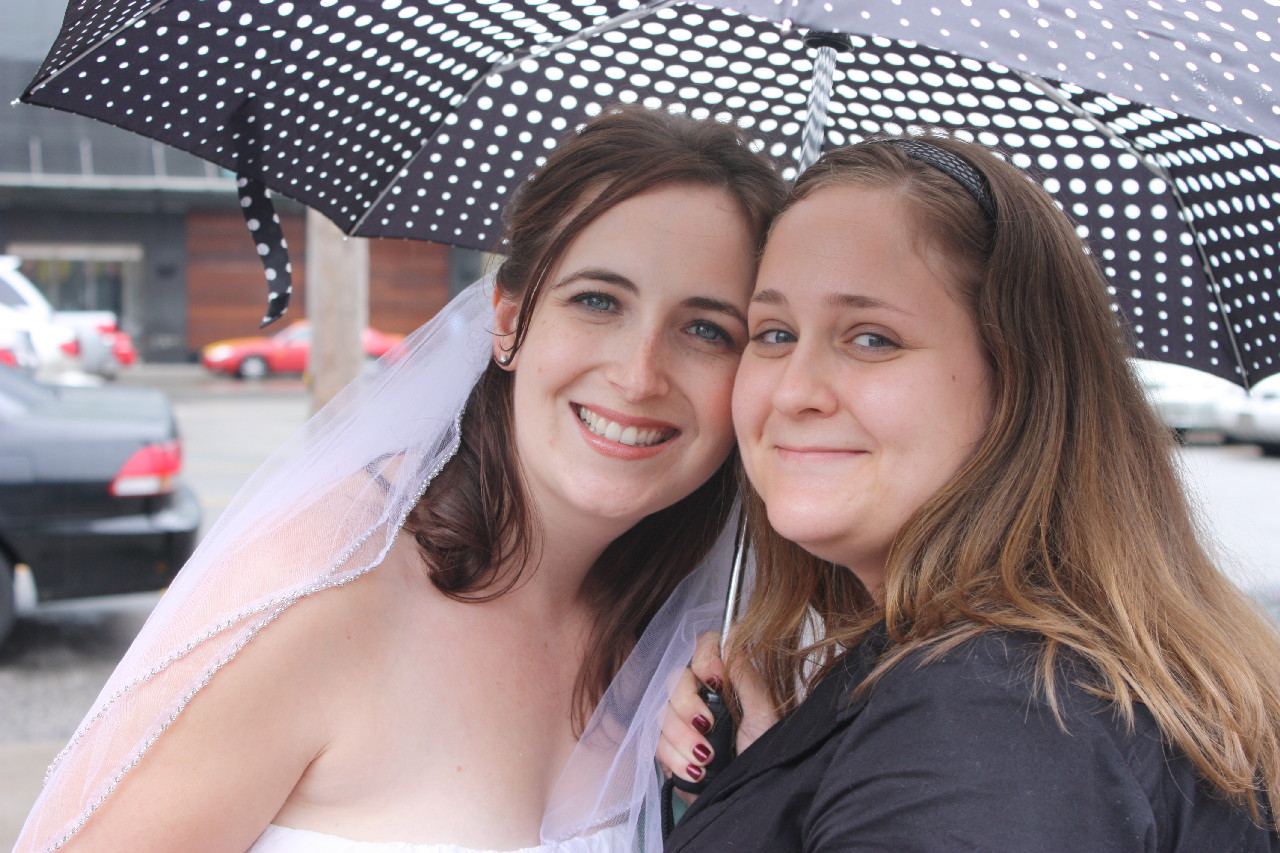
It started to spit rain a little, but we made it to the restaurant just in time. 


We pigged out on lobster and crab bisque, steak, seafood, and creme brulee at Fred's Not Here before our next stop. Mmmmm!!!!


Our last stop of the evening was a ghost walk tour of the University of Toronto campus. Both myself and two of my bridesmaids attended U of T, so it was really cool to wander around campus hearing the history and creepy stories! The mood couldn't have been more perfect with dusk getting deeper and deeper and the rain creating a mist around us. Most of the places we stopped were completely deserted because of the weather, so it was "ideal" on the creepiness meter!


And there you are! Bachelorette party done! It was a really fun day/evening and everyone had a great time! It was really low key with a lot of laughs and a lot of fun! Thanks ladies! Love you!!!

Friday, August 20, 2010

Just a little taste...

Last night we had our tasting. It makes me delirious thinking about how much food we ate. I asked my parents to join us since we have a lot to thank them for, and because I think my mom wasn't entirely comfortable with how we're doing our wedding. I think to her, a wedding is held at a country club or a hotel, this is waaaaaaaaaaaay outside the box for her. She's constantly worried about Ezra (our chef) breaking his arm or some other calamity happening. To put her mind at ease, I thought it would be best if she tasted his food herself to see why we were so adamant about having him do our wedding. Without further ado, grab a napkin to wipe up your drool and welcome to my wedding dinner!

Between the ceremony and the reception we're having a cocktail hour. There will be a large cheese buffet since Dan and I are pretty big cheese people. Mmmm cheese. So here we have ash-wrapped goat cheese, parmesean, and some sort of Quebecoise sheep cheese. I can't remember the name for the life of me. Ezra likes to do a goat, cow and sheep cheese each for varying textures and flavours. I say YUM!


Dan is super lactose intolerant, but he loves cheese. Note the Lacteeze bottle in the background. I force him to take it. He thinks cheese farts are funny, I say not so much.


Next, the passed appetizers. We have an organic scrambled egg tartlette with fresh herb salad and melon wrapped in prosciutto. The egg was unbelievably delicious, the texture was like silk! Melon wrapped prosciutto is entirely for me, I'm obsessed with it and ate it every day while I lived in Italy. Seriously. Every. Single. Day. 

  
More passed appetizers. At the back are pork, corn and shitake dumplings. Mmmmm!!!! In the middle a potato scallion galette with Georgian Bay smoked white fish. I really don't like fish. At all. I love fish the way Ezra does it. He's a genius! Last on the tray is actually part of our late night snack to be served at our sweet and savory buffet, a mini grilled cheese with paradiso cheese, bacon and caramelized onion. Mmmmm!!!!!


Next, we have our first course. An heirloom tomato gazpacho with lobster salad and homemade basil oil. I've never had a smooth gazpacho before and it was awesome! My dad saw it and said "I don't really like gazpacho...." and when I looked back 10 seconds later the bowl was empty and my dad was smiling. That says enough to me. 


Next, the vegetarian option. I seriously loved this so much I'm thinking about changing my meal order. It was a herbed carnaroli risotto with fresh green beans, cherry tomatoes, fontina cheese, pine nuts and a balsamic reduction. To die for. 


The parents seem happy.


Now for the carnivore's main: Cumbrae's flat iron steak with fingerling potatoes, local corn, summer squash, chimichuri and bordelaise sauce. Cumbrae's is a locally farmed, naturally raised, organic meat supplier. I love to eat organic meat but it's not always financially feasible, so it's awesome we're having it at the wedding! Forks at the ready people!


Someone's a happy bride!!!


To round off our dinner we have dessert. I'm a dessert person. I would eat chocolate cake for breakfast every day if Dan would let me and if it wouldn't cause some severe health issues. Ezra came up with poached peaches and financier cake (a buttery almond cake) with sea salt caramel ice cream. This ice cream is seriously the best I've had in my life. I LOVE IT!


Apparently not using utensils isn't appropriate, even if you are the bride.


And is if eating all that wasn't enough, we got to sample a few more of the items from our late night buffet!!!! First up, Ezra's version of poutine: home made fries with pulled pork, au jus, and some kind of cheese we can't remember... 


And on the sweet side, coffee and doughnuts: mini coconut doughnuts with coffee creme anglaise. Ezra put the leftovers of the coffee and doughnuts aside for us. We devoured them as soon as the door closed. 


My parents left both full and impressed. My mom loved Ezra and his food. My dad has called once and emailed twice to express his gratitude. They both agree they now understand why we put so much time and effort into finding a venue that could allow us to bring Ezra. 


Best. Wedding. Food. Ever.


**All photos are personal photos.

Wednesday, August 18, 2010

Practice Makes Perfect - DIY Rehearsal Invitations

I love paper. I love paper products. I love how much paper I get to play with for our wedding. Our invitations were streamlined, simple, and graphic. I wanted a more fun invitation for our rehearsal dinner since it will be a laid back, fun evening. I took inspiration from this:


Using Adobe Illustrator, I started playing with fonts and borders to create the invite. Then the fun stuff: the map. I have a love/hate relationship with map making. I hate doing it, but when it's done I feel so satisfied and proud of myself! Basically I just take a screen shot of a Google map, then trace it with the pencil tool in Illustrator. I nudge around the lines via the anchor points until it looks right and then add in the text for the street names. It some times involves a lot of swearing, but it gets done. I also copied the street directions directly from the venue website which helped a lot. So voila! Here they are!

 (Personal Photo)

Of course, me being me, I can't stop there. I bought some rolls of craft paper super duper on sale and used my handy Martha Stewart Scoreboard with its envelope guide and made me some envelopes! Then I scored the folds into my invite and map pages, folded those bad boys up together and tied with pretty red bakers twine

  (Personal Photos)


Before I sealed them up I embossed the back flap with our address and our wedding logo. I tried to address the front a bit funky and neat since the invites are so much fun!


  (Personal Photos)

I'm loving the Roadside Attraction stamp series Canada Post has out right now. They're adorable and remind me so much of our roadtrip to the East coast that my dad Dan one of the men in my life proposed at the beginning of! All in all, this project probably took me a day between the layouts, fighting with the maps, and making envelopes. I think it's worth it :)

Chicken in Red Curry with Sticky Rice

For any of my Canadian friends, I'm sure you're familiar with Loblaws Supermarkets. If you've never done one of their Loblaws Upstairs cooking classes at the bigger stores, you really need to! They're awesome! A few months ago I did a Thai cooking class with my future mother-in-law led by chef Florence Kwok and we had a blast. Every single one of the recipes Florence taught us was awesome, but here's one I've made a few times since because of it's simplicity and deliciousness!

Chicken in Red Curry
1-1/2 lbs boneless & skinless chicken thigh fillets 
1 can cut baby corn
1 red bell pepper, cut into thin strips
2 cans thick coconut milk (don't shake up!)
2-3 tbsp red curry paste (A Taste of Thai brand in the packet, not the jar, it has more flavour)
1 bunch fresh basil leaves
  • Cut chicken into large pieces
  • Cook curry paste in heated pan with 1 cup of coconut milk, stirring, until it thickens and oil starts to seperate (if you don't shake up the can, you won't have oil since it will be left at the bottom of the can, so just cook to thicken)
  • Add chicken to pan ; cook, stirring, for a few minutes. Add another cup of coconut milk and turn heat down to simmer. Continue to cook for 15-20 minutes until chicken is tender.
  • Add baby corns, peppers and more coconut milk (if necessary). Continue cooking for a few more minutes until corns are heated through. 
  • Turn off heat and add basil leaves
  • Serve over sticky rice

** Veronica's notes  - I used cut up chicken breasts rather than thighs because I prefer it. The cooking time was the same. Florence recommends you use air chilled chicken which has less moisture. I asked Florence about substituting in low fat coconut milk to which she replied "You only live once! You're not eating this every night!" so I've lived by that mantra ;)

The Easiest Best Sticky Rice You'll Ever Make
2 cups sweet glutinous rice, rinsed 
2 cups water
  • Soak the sticky rice for 10 minutes in hot water in a non-plastic, microwave friendly bowl. Do not skip this step!!!
  • Cover the bowl with a dish (a plate works best) and cook in the microwave at full power for 3 minutes. 
  • Stir the rice around moving from top to bottom
  • Cook for another 2 minutes on full power
  • Check to see if done, and if not, continue to cook and check every minute or so until rice is cooked (should look translucent). The timing will vary based on your microwave. 
** I doubled this recipe and it took a fair bit longer, probably about 10 minutes (double the time, duh) and made about 12 servings. Seriously, it was so sticky I couldn't get it off my fingers. That's some good sticky rice!! Enjoy!

Thursday, August 12, 2010

I'm MIA, and reasons not to have a wedding under a tent in Ontario

My bridesmaid/"cousin" (You know those close friends of the family type people you call aunts and uncles and cousins? Ya, that's her. Funny thing is, I think I'm closer to them than some of my own family!) is visiting from Kansas right now. I don't get to see her often since Kansas is a heck of a long ways away, so we've been spending the week doing wedding related stuffs. She's been keeping me honest and making sure I work hard on wedding items. So far we've hunted for the big tall vases (a no go, as the only ones we found were $85 a piece, yikes!), made the place cards, make little accessories for the place cards (more to come on that), started cutting the menus on the Cricut, unpacked all my shower gifts, reorganized my kitchen to fit in all the shower gifts, gone to Michaels for supplies a million times, and picked up the liquor license and building permit. 


Building permit?! What in the world?! I know. Here's my rant as to why not to have a wedding under a tent in the province of Ontario. At first, you'll think "Oooh we'll have an outdoor wedding under a tent and it'll be beautiful and simple and cheap!". And then you'll book your $2000 tent and think, wow, that price stinks, but oh well, it'll be lovely. And then you'll realize "Oh no, wait, now I need tables and chairs and plates and glasses and linens and salt and pepper and bread baskets and every little thing on the face of the earth! This is not easier OR cheaper!!!". So you book all that. And then you realize you have to apply for a liquor license which in itself is easy enough. The not fun part is notifying the police department, health department, fire department, municipal clerk's office, and building department of said event by letter and having to drive around to all of these places (especially when your venue is an hour plus away in another municipality). And then you find out that you also need a building permit to erect your massive tent for 36 hours and need to pay them $125 for said permit, and give them a stack of paperwork an inch thick for your application. And don't forget to call the conservation authority because your tent extends 5' onto a floodplain and you need their clearance for your permit. AND THEN when you pick up said permit you find out that after the tent is erected and before the event, you have to have a building inspector come out to make sure that the tent is erected properly. If you've made it this far, congratulations. I assume you're headed to Vegas rather than going down this road?!

In all seriousness, it is a huge pain in the a$$, but I've muddled my way through all the bureaucracy and it's done. If I had to do it all over again, I perhaps might have gone down a different road, but I know our tented wedding will be gorgeous and worth every penny. Rules and regulations vary region by region, so perhaps where you live people aren't such killjoys ;)

Saturday, August 07, 2010

Flower Power and Trimming a Budget

I had my centrepiece trial with our amazing florist this week. I've been working with Tanya and I love how knowledgeable she is about what's in season throughout the year, what's worth splurging on vs where we can save money. She's been fabulous to work with to say the least. She's also really enthusiastic about the silver teapots and I think we're both really looking forward to seeing it come together! I got to the shop and she filled up my teapot with a mix of dusty miller, lisianthus, wax flowers, freesia and some big gorgeous roses. Swoon.  


I know I know! You're insanely jealous! I'm sorry! Tanya was a sweetheart and packed up the teapot full of flowers and sent them home with me. What the what?! I have to say, the roses opened up a bit more the next day and looked even more beautiful if that's possible! I love the wax flowers and the vintage touch it adds to the arrangement. I'm so glad Tanya suggested it! 

I have a but. BUT as I hauled my centrepiece off to my hair/make up trial, I realized the teapot was leaking! ACK!!! A weld under the spout had given (come on, the thing is how old, it's sort of to be expected) and slowly the teapot was losing water. I don't know why the possibility that the teapots might leak didn't occur to me at any point during this process. When I got home I emptied the teapot and stuffed it full of soaked floral foam wrapped in plastic wrap and attempted to rearrange it as beautifully as Tanya had originally done. It's not perfect, but it'll do. I made sure to shoot Tanya a quick email to let her know floral foam was a must, water was a no go. I'm hoping that's the only teapot of the lot that's pooched, but I'm not willing to risk it! I'm thankful though that it did happen rather than having the teapots leak all over the tables at the wedding!

Now for the budget part. Oh my. So we've added a lot of things to our floral budget. A lot a lot. Clearly that means the price is going to go up. A lot. A lot a lot. Tanya and I talked about what we could do to cut back and we've come up with a few options. 

1) We DIY the moss and orchids around the firepit. Easy peasy. I have a couple of amazingly wonderful friends who have volunteered to wire the orchids to the corkscrew hazel another friend is loaning us, and they're going to lay the moss around the firepit. I found some floral wholesale shops nearby and since I'm an interior designer with my own business, I was allowed to shop there! I got all the moss for $50, and I found orchids for $1.70/stem. That was a very full stem too, like 20 flowers. I can't believe how cheap it is!!! This is going to save us about $300. 

2) We DIY the creamer and sugar bowls. I just wanted to fill them with baby's breath. Considering the man power to fill them, we were quoted $12/bowl, or just about $500 total. Tonight, I decided to do a test run. I bought two big bunches of baby's breath from the florist wholesaler (seriously my new favourite place) for about $15. I filled 7 cream and sugar bowls with plenty of baby's breath to spare in about 45 minutes. Figure in the learning curve with that as well. Not bad!!! I think it should cost us about $45 total to do 40 cream and sugar bowls, a savings of $455. 


(There are two types of baby's breath. Do you like the small ones on
the left, or the mixture of the two on the right?) 

3) We buy the vases for the curly willow accents we have around the room and then re-sell them afterward. The vase rental is $50 each, and we have eight of them, so $400 total. Plus we need to return them within four days of the wedding. Even if we bought them at the same price, at least we wouldn't have to rush to figure out what the heck we're going to do with all the curly willow (they can be rooted and planted in the garden), they can stay in the vases until we come back from our honeymoon, and then we could sell the vases online for a bit less than we bought them. If we sold them at 50% off, we could save $200. So far though, I've been having trouble finding a tall enough vase, but I'm going to keep hunting for them on Monday. 

Just by doing those three things, we could knock over $1000 off our floral budget once you add in taxes. I'm also hoping that if we're transporting all the creamers Tanya will be able to fit everything in one truck rather than two and we can get our delivery cost back down. I love having a vendor that I can be honest with and say "Woah, this is slightly crazy, let's scale back!" and she's so open to suggesting how and where we can do that. Hooray for great vendors! 

Are you DIY-ing your flowers? How are you keeping your floral budget under control? 


** All photos are personal photos.

Monday, August 02, 2010

Hi Ho Silver!

When Dan and I first started looking for inspiration for the wedding, we were coming from two opposite ends of the spectrum. He likes natural and wild flowers, I like elegant and girly. Even in our home it's hard to marry these two styles, and we've really learned the art of compromise. When this photo came up on 100 Layer Cake, I knew we had found our inspiration. 


It's elegant, it's rustic. It's vintage, it's contemporary. It's to die for! I decided then and there that I needed to recreate this look for our wedding. We have a friend collecting barn board for us, and I've been scouring local thrift shops weekly to find silver teapots, creamers and sugar pots. I wrapped lace around votives and I have a mercury glass project I'm testing out this week and hoping it will add a bit more sparkle to the table! 

So what do you get when you spend a good couple hours each week raiding local thrift shops? 

27 teapots. 40 cream and sugar pots. A dozen candle stick holders. Whew! And I'm not done yet! I've decided we have enough for the bare minimum, but not enough to make me happy! Here are a couple of my favourite finds so far. 

 (Personal Photo)

I love this little pearlized teapot. Like I love it so much it may not make an appearance at the wedding because I don't want to give it away!!!

(Personal Photo)

And how awesome is this stacking set?! I'm hoping our florist can figure out a way to keep them stacked and stuff flowers between each layer. I have my centrepiece trial with our florist on Wednesday so I decided to polish a few pieces of the older silver up. Oooh boy that takes some elbow grease and a heck of a lot of patience!!!


 (Personal Photos)

Tarnished vs polished. Dan likes them tarnished (probably because it's easier just to leave them be), but you better believe I'm polishing these puppies up! In the end all the hard work is going to be worth it and I love getting my hands dirty doing stuff like this. I feel so happy that I'm a bride who's enjoyed getting into all the little details and investing myself into projects like this. I know not everyone would really care about centrepieces, never mind picking each one themselves. So there you are! I'll be sure to post photos from our trial on Wednesday. I'm smiling just thinking about it!